Categories
Uncategorized

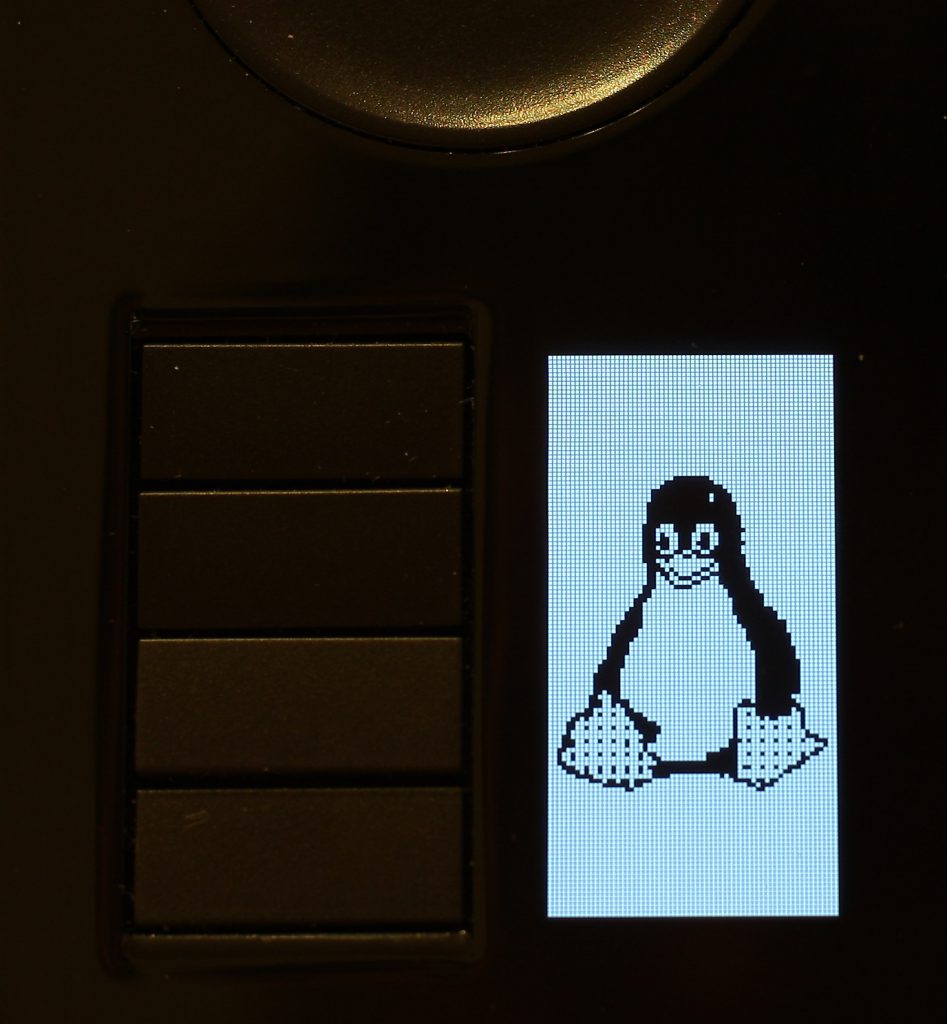
OLEDs on Intuos4 Wireless are 4-bit!!

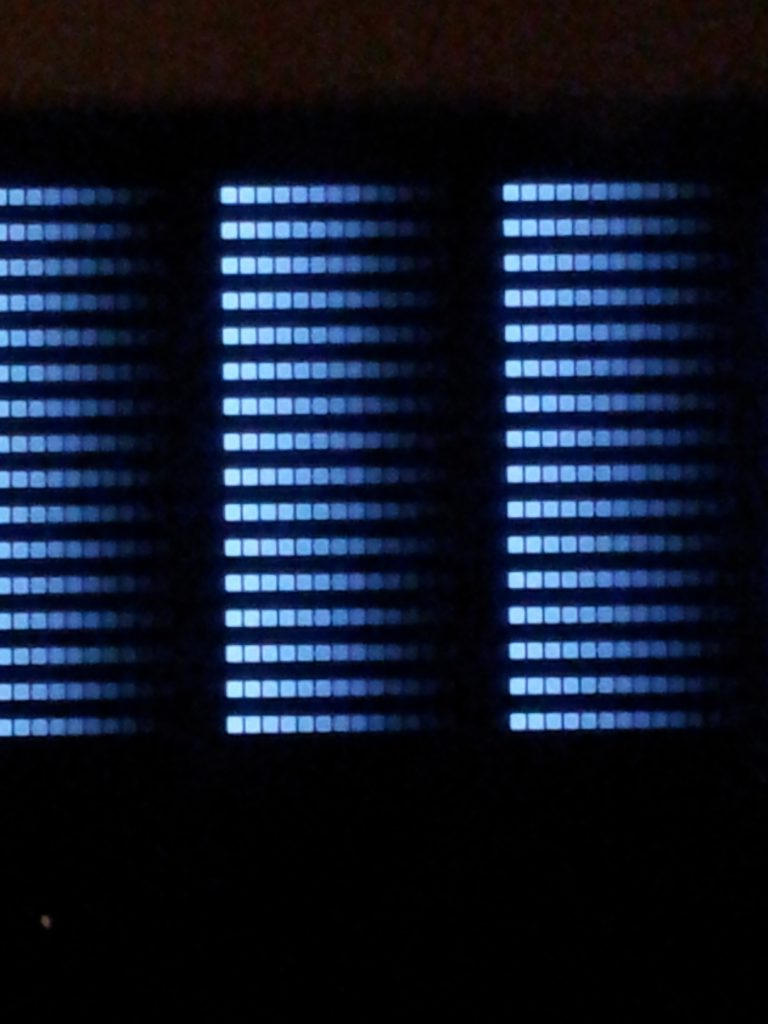
I found out that OLEDs on my Intuos4 Wireless are actually 4-bit colour instead of 1-bit. I don’t know (yet) a method of setting 4-bit icons over bluetooth, but I have a proof that it can be done over USB. The proof:

Intuos4 Wireless 4-bit OLEDs

It’s close up of one of the OLED displays on Intuos4 Wireless connected with USB cable.

Categories
Uncategorized

OLED icons on Wacom Intuos4 Wireless PTK-540WL – part 2

Full workflow how to get a custom icon on Wacom Intuos4 WL (this doesn’t work for other Intuos4 family members!)

Make a 1-bit 64×32 pixels image. Let’s say it’s the recycling symbol:

Save it to PBM format, raw version. GIMP is perfect for that. Open the newly created file in a text editor. The header should look similar to this:

P4
# CREATOR: GIMP PNM Filter Version 1.1
64 32

It means that we created “portable bitmap/binary” using GIMP and the dimensions are 64 by 32 pixels. The rest of the file contains actual image, saved in 256 bytes, 8 pixels per byte. PBM icons here (full pack).

Now strip the header and save the “raw” icon. The file should hve exactly 256 bytes. If it has more or less it might mean that your text editor cannot handle binary files (try vim!) And again you can download “raw” icons – link above (same as PBM icons). Save the file to “recycle.i4wl” or download ready “recycle” icon from the pack.

Now connect the tablet using bluetooth connection. You should see some oled_*img files in /sys/class/hidraw/hidraw(dev_number)/device directory. Each of those 8 files represents one icon on wacom Intuos4 wireless tablet. See this entry for information how to set the icon on your tablet using “dd” command. Hopefully setting the icons will be included into wacom gnome-control-center panel (any volunteers? 😉 )

Come back later to see how to batch create icons!

Categories
Uncategorized

How to use an android phone as a GPS receiver with GPS-less tablet using only GPL software….

.. or how to use GPS-less tablet as big screen GPS car navigation. The setup that I tested:

– tablet Sanei N10 Deluxe with Android 4.0.3

– Samsung Galaxy S2 with CyanogenMod9

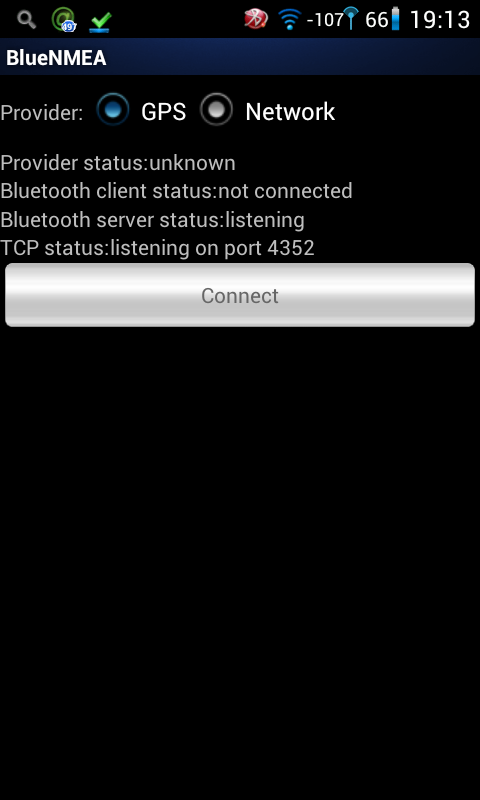
The tablet has no GPS receiver, so my favourite navigation/tracking OSMAnd cannot be used directly. To solve that problem I downloaded BlueGPS for the tablet and BlueNMEA for the phone. BlueNMEA works as GPS data server, the location is transmitter over bluetooth to BlueGPS on the tablet. BlueGPS uses “mock location” function to provire real GPS location for all the software runnng on the tablet.

How to set it up?

1. Allow use “mock locations” in

Settings -> Developer Options -> Allow mock locations on the tablet.

2. Pair tablet and phone using normal bluetooth functions in

Settings -> Bluetooth

3. Start BlueGPS on tablet

4. Start BlueNMEA on the phone

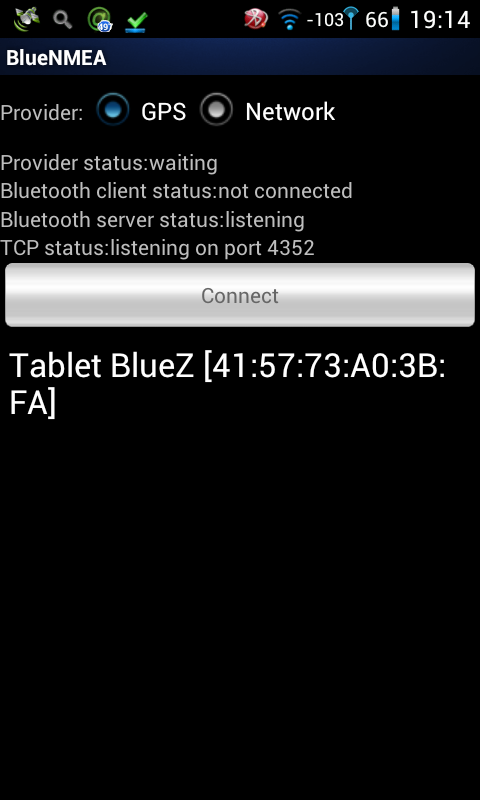
5. Wait for the tablet to appear on devices list

6. As soon as the phone GPS get fix the info is passed to the tablet, so it can be used by i.e. OSMAnd or any other navigation software.

Categories
Uncategorized

OLED icons on Wacom Intuos4 Wireless PTK-540WL

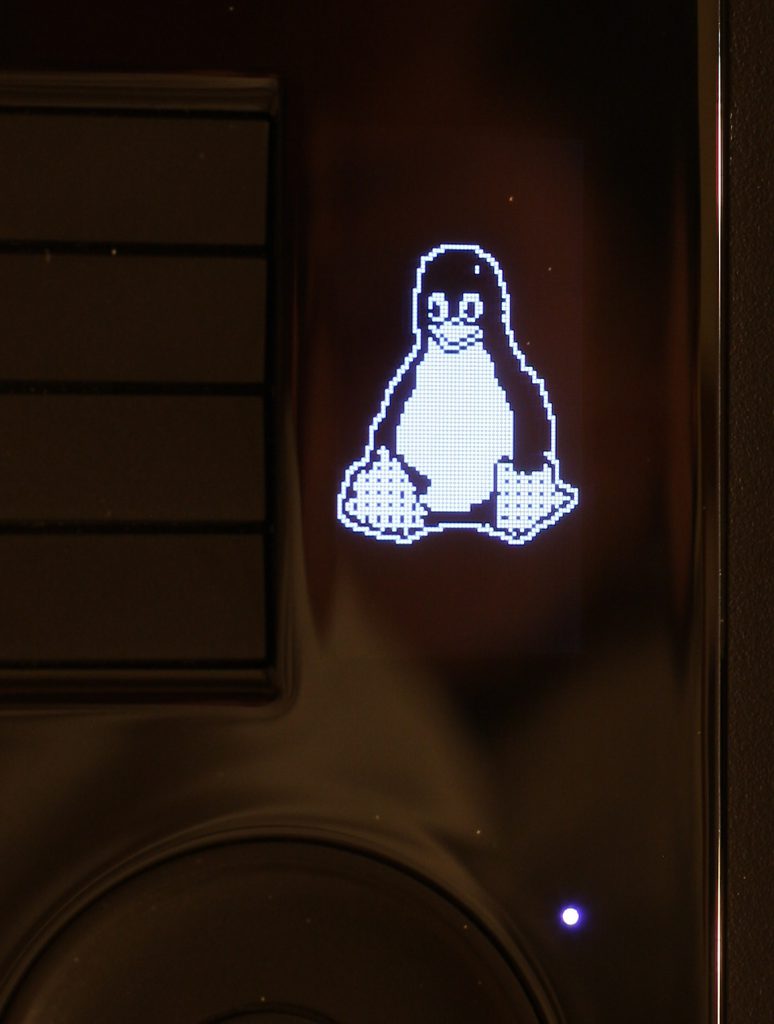
I just submitted 2 kernel patches [PATCH 1, PATCH 2 there is a good chance that it’s not the final version, but it works] that will allow to set OLED icons on Wacom Intuos4 Wireless PTK-540WL tablet. The patechs create some “control” files in /sys/class/hidraw/hidraw/dev_no/device. The files are named oled*_img where * is number 0 to 7. Each of them represents one icon on the tablet. Sending a 256 bytes long file to an oled*_img control file writes it to tablet memory. The result can look like this:

or this

Arrows on wacom intuos4wl

The control files accept simple pbm format but without the header. The image has to be 64 by 32 pixels, so the length without the header is 256 bytes. If the file has different length it won’t be accepted as kernel performs length check.

Example of command line method for sending the icon:

dd bs=256 if=icon_file.i4wl of=/sys/class/hidraw/hidraw1/device/oled1_img count=1

To see the icon we have to change it’s brightness (it also lights one of the wheel’s leds):

echo 50 > /sys/class/hidraw/hidraw1/device/leds/0005\:056A\:00BD.0001\:selector\:0/brightness

More icons and full work flow from an image to icon on the tablet soon.

P.S. Look here for *.i4wl files if you want more icons

Categories
Uncategorized

Setting device permissions for Samsung Galaxy S2 with udev

As SYSFS is now obsolete on some systems the rule for Samsung Galaxy S2 should be now:

SUBSYSTEM=="usb", ATTR{idVendor}=="04e8", MODE="0666"

See here a previous entry for more details how and where set the rule for udev.

Categories
Uncategorized

Samsung S2 – best phone ever?

Finally I got my Samsung Galaxy S2. –Stay tuned for a tutorial how to root it and install Cynanogenmod in a linux way (no Kies, no Odin, no windows – only Heindall and linux command line)–

Categories
Uncategorized

CyanogenMod on LG P500

I finally found some time to play with CyanogenMod. Installation is easy if you know where are the pitfalls – I didn’t know. First and foremost: backup! Backup of contacts, backup of text messages, backup of current rom. Then installation of flash_image, recovery-RA-GNM-thunderg-1.1.0.img and ClockWorkMod – it has to be done manually, but hopefully will be changed soon. Having that set installed phone is ready to be wiped out (data & cache). The final step: CyanogenMod is easy. I‘m was going to make tutorial how to install CyanogenMod on LG P500 starting from original LG rom, but things are changing at the speed of light – I might make tutorial on Samsung Galaxy S2 soon (whatever soon means this time).

Categories
Uncategorized

Hello World, my first android application in 3 steps (CLI only)

The official android webpage suggests that Eclipse is the best tool for developing. I tried really hard to set it up, but after 2 days, 6 IRC channels and many different config switches tested I gave up. PermGen out of memory error finally won with my patience. Looks like my problems were caused by java virtual machine I tried to use, but it makes no difference at all – Eclipse was unusable. I decided to got the CLI way and I’m not disappointed.

A few words of explanation: I’ll show how to create a simple “Hello World” app using just one console (or terminal window), but it’s much more convinent to use 2 or 3 of them to avoid changing directory all the time.

Three steps to my first application

1. Go to “tools” directory in android-sdk:
przemo@pldmachine ~$ cd ~/android/sdk/tools/
and type (in one line): ./android create project
–target android-8
–name Test
–path /home/users/przemo/workspace/Test
–activity TestActivity
–package com.android.test

przemo@pldmachine$ ./android create project --target android-8 --name Test --path /home/users/przemo/workspace/Test --activity TestActivity --package com.android.test
Created project directory: /home/users/przemo/workspace/Test
Created directory /home/users/przemo/workspace/Test/src/com/android/test
Added file /home/users/przemo/workspace/Test/src/com/android/test/TestActivity.java
Created directory /home/users/przemo/workspace/Test/res
Created directory /home/users/przemo/workspace/Test/bin
Created directory /home/users/przemo/workspace/Test/libs
Created directory /home/users/przemo/workspace/Test/res/values
Added file /home/users/przemo/workspace/Test/res/values/strings.xml
Created directory /home/users/przemo/workspace/Test/res/layout
Added file /home/users/przemo/workspace/Test/res/layout/main.xml
Created directory /home/users/przemo/workspace/Test/res/drawable-hdpi
Created directory /home/users/przemo/workspace/Test/res/drawable-mdpi
Created directory /home/users/przemo/workspace/Test/res/drawable-ldpi
Added file /home/users/przemo/workspace/Test/AndroidManifest.xml
Added file /home/users/przemo/workspace/Test/build.xml
Added file /home/users/przemo/workspace/Test/proguard.cfg

As you can see “android” did all the boring job of creating app skeleton for us.

2. Go to the application directory and compile it.przemo@pldmachine$ cd ~/workspace/Test/
przemo@pldmachine$ ant debug

[removed compile output]
.. debug:
        echo Running zip align on final apk...
        echo Debug Package: /home/users/przemo/workspace/Test/bin/Test-debug.apk
BUILD SUCCESSFUL
Total time: 4 seconds
przemo@pldmachine ~/workspace/Test$

Those are only last few lines of a sucessful build. Now we’re ready to install the app 3. Go to “platform-tools” and upload the app to phone:

przemo@pldmachine$ cd ~/android/sdk/platform-tools/
przemo@pldmachine$ ./adb -d install /home/users/przemo/workspace/Test/bin/Test-debug.apk
*daemon not running. starting it now on port 5037 *
*daemon started successfully *
233 KB/s (13223 bytes in 0.055s) pkg: /data/local/tmp/Test-debug.apk Success
przemo@pldmachine$

Now you should see a new application named TestActivity in your phone. It doesn’t do anything useful, but that’s my first android app!

Categories
Uncategorized

LG Optimus One P500 – first steps of an android developer

I got my LG P500 roughtly 30 hours ago, so it’s high time to share the first impressions. If you’re looking for a review if the phone is good, responsive, have a good display and so on – yes, the phone is quite good and I like it. I bought P500 to get some hands-on experience with android, so the most important thing for me was to get access from android sdk. It’s really easy if you’re a linux user. If you’re still using windows – I’m sorry that’s a linux fanboy blog. Switch and come back later….

Now let’s move to some more interesting stuff.

First, you have to switch on USB debugging on P500. It’s in Settings/Applications/Development. Next connect USB cable. Do not select option to connect as an USB storage. Open a terminal and type “lsusb” to check if your linuxbox sees the phone:

przemo@pldmachine ~$ lsusb
Bus 001 Device 001: ID 1d6b:0002 Linux Foundation 2.0 root hub
Bus 002 Device 001: ID 1d6b:0001 Linux Foundation 1.1 root hub
Bus 003 Device 001: ID 1d6b:0001 Linux Foundation 1.1 root hub
Bus 004 Device 001: ID 1d6b:0001 Linux Foundation 1.1 root hub
Bus 002 Device 002: ID 0a12:0001 Cambridge Silicon Radio, Ltd Bluetooth Dongle (HCI mode)
Bus 003 Device 002: ID 03f0:011d Hewlett-Packard Integrated Bluetooth Module
Bus 001 Device 015: ID 1004:618e LG Electronics, Inc.

OK, we’ve got it! Now go to your android sdk directory (how to install android-sdk) and type:

przemo@pldmachine ~/android/sdk$ platform-tools/adb devices

The result will look probably like this:

przemo@pldmachine ~/android/sdk$ platform-tools/adb devices
List of devices attached
???????????? no permissions

Which means that the LG P500 is connected but you don’t have enough access rights. To fix it we have to define a new rule for udev. You have to be root or use sudo to do it. The file should be located in /etc/udev/rules.d/51-android.rules and it should contain just one line:

SUBSYSTEM=="usb", [SYSFS]ATTR{idVendor}=="1004", MODE="0666"

It used to be SYSFS, but now it’s ATTR. It defines that udev should give you full access rights when a LG device (idVendor=”1004″) is connected – 1004 is the same number that is bolded in the results of lsusb command. The last touch, changing access rights to the rules file:

chmod a+r /etc/udev/rules.d/51-android.rules

Now reconnect your phone to get full access rights:

przemo@pldmachine ~/android/sdk$ platform-tools/adb devices
List of devices attached
80A354043043410507 device

We can test if it really works, let’s try to open remote shell on our shiny P500:
przemo@pldmachine ~/android/sdk$ platform-tools/adb shell

$ ls -l
dr-x------ root    root             2011-02-02 13:03 config
drwxrwx--- system  cache            2011-02-03 18:23 cache
lrwxrwxrwx root    root             2011-02-02 13:03 sdcard -> /mnt/sdcard
drwxr-xr-x root    root             2011-02-02 13:03 acct
drwxrwxr-x root    system           2011-02-02 13:03 mnt
lrwxrwxrwx root    root             2011-02-02 13:03 d -> /sys/kernel/debug
lrwxrwxrwx root    root             2011-02-02 13:03 etc -> /system/etc
drwxrwx--- lgdrm   lgdrm_acc        1980-01-06 00:19 lgdrm
drwxrwx--x system  system           2011-02-02 13:03 persist
drwxr-xr-x root    root             2010-10-01 22:48 system
drwxr-xr-x root    root             1970-01-01 01:00 sys
drwxr-x--- root    root             1970-01-01 01:00 sbin
dr-xr-xr-x root    root             1970-01-01 01:00 proc
-rwxr-x--- root    root       16316 1970-01-01 01:00 initlogo.rle
-rwxr-x--- root    root        9323 1970-01-01 01:00 init.thunderg.rc
-rwxr-x--- root    root       18323 1970-01-01 01:00 init.rc
-rwxr-x--- root    root        4869 1970-01-01 01:00 init.qcom.rc
-rwxr-x--- root    root        3352 1970-01-01 01:00 init.qcom.post_boot.sh
-rwxr-x--- root    root         122 1970-01-01 01:00 init.lge.hidden_reset.sh
-rwxr-x--- root    root      357656 1970-01-01 01:00 initv
-rw-r--r-- root    root        1152 1970-01-01 01:00 fota.rc
-rw-r--r-- root    root         118 1970-01-01 01:00 default.prop
drwxrwx--x system  system           1980-01-06 00:19 data
drwxr-xr-x root    root             1970-01-01 01:00 chargerimages
drwxr-xr-x root    root             1970-01-01 01:00 bootimages
drwx------ root    root             2010-10-01 22:03 root
drwxr-xr-x root    root             2011-02-03 22:35 dev

Hey, it looks almost like a normal linux box root directory! I like it…. 🙂

Categories
Uncategorized

Git – the beginning

So, you prepared a bug fix for your favourite piece of software, you’re sure that it fixes all problems (also future problems!!) you’ve ever had and, of course, it’s a perfect piece of code. But after sending the perfect patch to relevant discussion list you received something like that:

Hi,
The patch seems to be OK. Can you remove trailing spaces, fix formatting, submit the patch in git format and add signed-off-by?

After reading it for the third time you knew that you had to learn more about how git works and why trailing spaces are bad.. I had the same problem some time ago. There are quite a few howtos, quick starts and tutorials for git, but nonetheless some information is hard to find, especially if you’re not sure what you’re looking for.
Let’s start with “trailing spaces”. If you’re using a normal editor you might not even notice that there are some “trailing spaces” in your code. And at the end of the day, tha patch works, so why bother? A short example:

przemo@pldmachine /tmp$ touch test
przemo@pldmachine /tmp$ touch "test "
przemo@pldmachine /tmp$ ls -l
-rw-rr 1 przemo users 0 12-05 01:17 test
przemo@pldmachine /tmp$

How do you like having 2 “identical” files in the same directory? The same thing can happen in your code – trailing spaces can give false positives when comparing two files. Another example:

przemo@pldmachine /tmp$ diff -Nru test1 test2
--- test1 2010-12-05 14:20:11.282835872 +0000
+++ test2 2010-12-05 14:18:48.271759248 +0000
@@ -1 +1 @@
-This is a line of comment
+This is a line of comment
przemo@pldmachine /tmp$

Are those 2 lines the same or they are different? “Trailinig spaces” are bad!
A next issue is code formatting. On some projects there are very loose rules, on some, like linux kernel, rules are the strict. Anyway you shoud always know what are the rules for the project you’re working on and adhere to them. If in doubt – ask. If you’re not sure why code formatting is an important thing, try to find something in a piece of badly formatted php code – it’s very, very hard.
The last part of the fix-your-code email was request for a git formatted patch. I presume you already have a git repository withthe project (git clone path-to-the-project) and you made the modifications to the code. A next step is to commit your modifications to the git repository:

git commit -a

“-a” switch tells git that you want to include all modified files to the repo. After issuing that command you’ll see an editor window with some information about the changes you made. git is expecting you to type name for the commit in first line of the editor (a short description what your patch is). The second line should be empty and starting from 3rd line you should give detailed description how your patch works. The title of the patch and it’s description may seem to be a silly idea for beginners – my patch works, I know how it works, so simple “Fix that annoying bug” comment should do. Let me say that I can bet that in six month time you will not know what was the bug, how the code works and if it was required at all! Another thing is that you’re not working alone – the patch you made should be easy to read and to understand for the person responsible for the project. You should not expect that he or she is going to analyse your code without good explanation. Now the “signed-off-by”. It’s meaning can be different for different projects, but in generel it maens that the patch is complete, ready for review and that you agree to use it in the project. Adding “signed-off-by” is very easy. “-s” option does it for you:

git commit -a -s

If you already commited you changes to the repo you can use “–amend” option:

git commit --amend -s

This time git opens editor window, with your previous title of the patch and the description, but there is one new thing – below the last line of the description git adds an empty line and somethinglike this:

Signed-off-by: John Doe <john@doe.eu>

Now we have the patch commited, with proper title, description and signed-off-by line. We want git to save the patch as a file:

git format-patch HEAD~1

The HEAD~1 part means the we want to generate patch for HEAD (it’s the current state of the repo) minus one commit. You can also use HEAD~2 or HEAD~5 to generate more that just one patch. If you open the file that git just created and you’ll see that it contains all the required information: title, description, signed-off-by and all the changes you made to the code.